Programmable hardware TOTP token in a card format that fits any authentication system
Classic hardware TOTP token with SHA-1 algorithm support
Programmable hardware TOTP token in a key fob format that fits any authentication system
Classic hardware TOTP token with SHA-256 algorithm support
Programmable hardware TOTP token in a card format that fits any authentication system
Classic hardware TOTP token with SHA-1 algorithm support
Programmable hardware TOTP token in a key fob format that fits any authentication system
Classic hardware TOTP token with SHA-256 algorithm support
A free 2FA authenticator app with cloud backup, easy token transfer to a new phone, PIN and biometric authentication protection
Free OTP delivery with chatbots in messaging apps
Delivery of one-time passwords via SMS messages
Free delivery of one-time passwords via email
Free one-time passwords delivery via push notifications
Guides
This guide shows how to enable Fortinet FortiGate VPN 2FA (two-factor authentication) via the RADIUS authentication protocol using Protectimus multi-factor authentication system.
Two-factor authentication is a must-have measure of cybersecurity, especially if we talk about VPN connection security. Set up 2-factor authentication for Forticlient VPN to protect your users’ accounts and sensitive corporate data from unauthorized access. 2FA for Fortinet FortiGate VPN is an effective tool against brute force, data spoofing, social engineering, phishing, keyloggers, man-in-the-middle attacks, etc.
Setting up two-factor authentication for the FortiGate VPN, you make your end users enter two different authentication factors to get access to their accounts.
Fortinet FortiGate VPN 2FA enabled makes it too hard to get unauthorized access to the user account because it is almost impossible to hack both authentication factors simultaneously. And what makes the task even more challenging is that a one-time code is valid only for 30 seconds.
Below you will find detailed instructions showing how to set up Fortinet Fortigate VPN 2FA via RADIUS using the Protectimus Cloud Two-Factor Authentication Service or Protectimus On-Premise 2FA Platform.
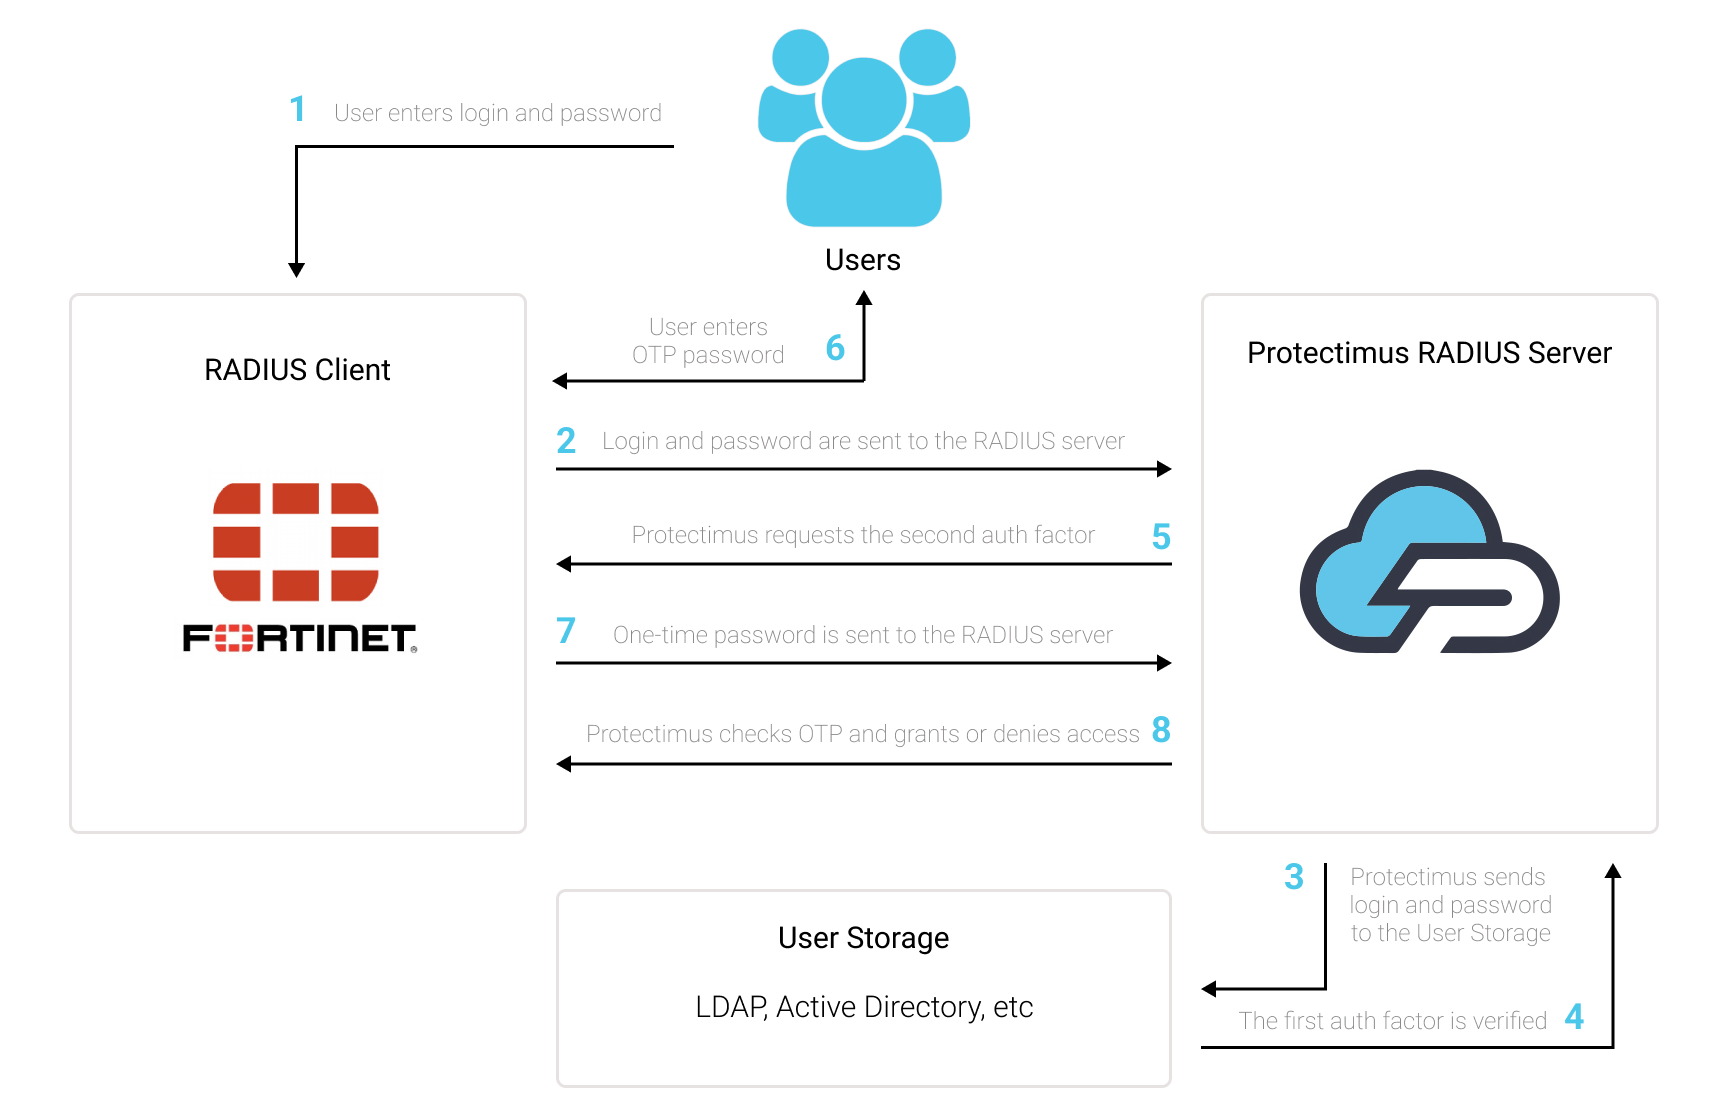
You can set up FortiGate VPN two-factor authentication (2FA) with Protectimus using the RADIUS protocol:
- Get registered with Protectimus SAAS Service or install the On-Premise 2FA Platform and configure basic settings.
- Install and configure Protectimus RADIUS Server.
- Configure FortiGate VPN authentication policies.
Detailed instructions for installing and configuring the Protectimus RADIUS Server for Fortinet FortiGate 2-factor authentication using RADIUS are available in our Protectimus RADIUS Server Installation Guide for FortiGate VPN 2FA.
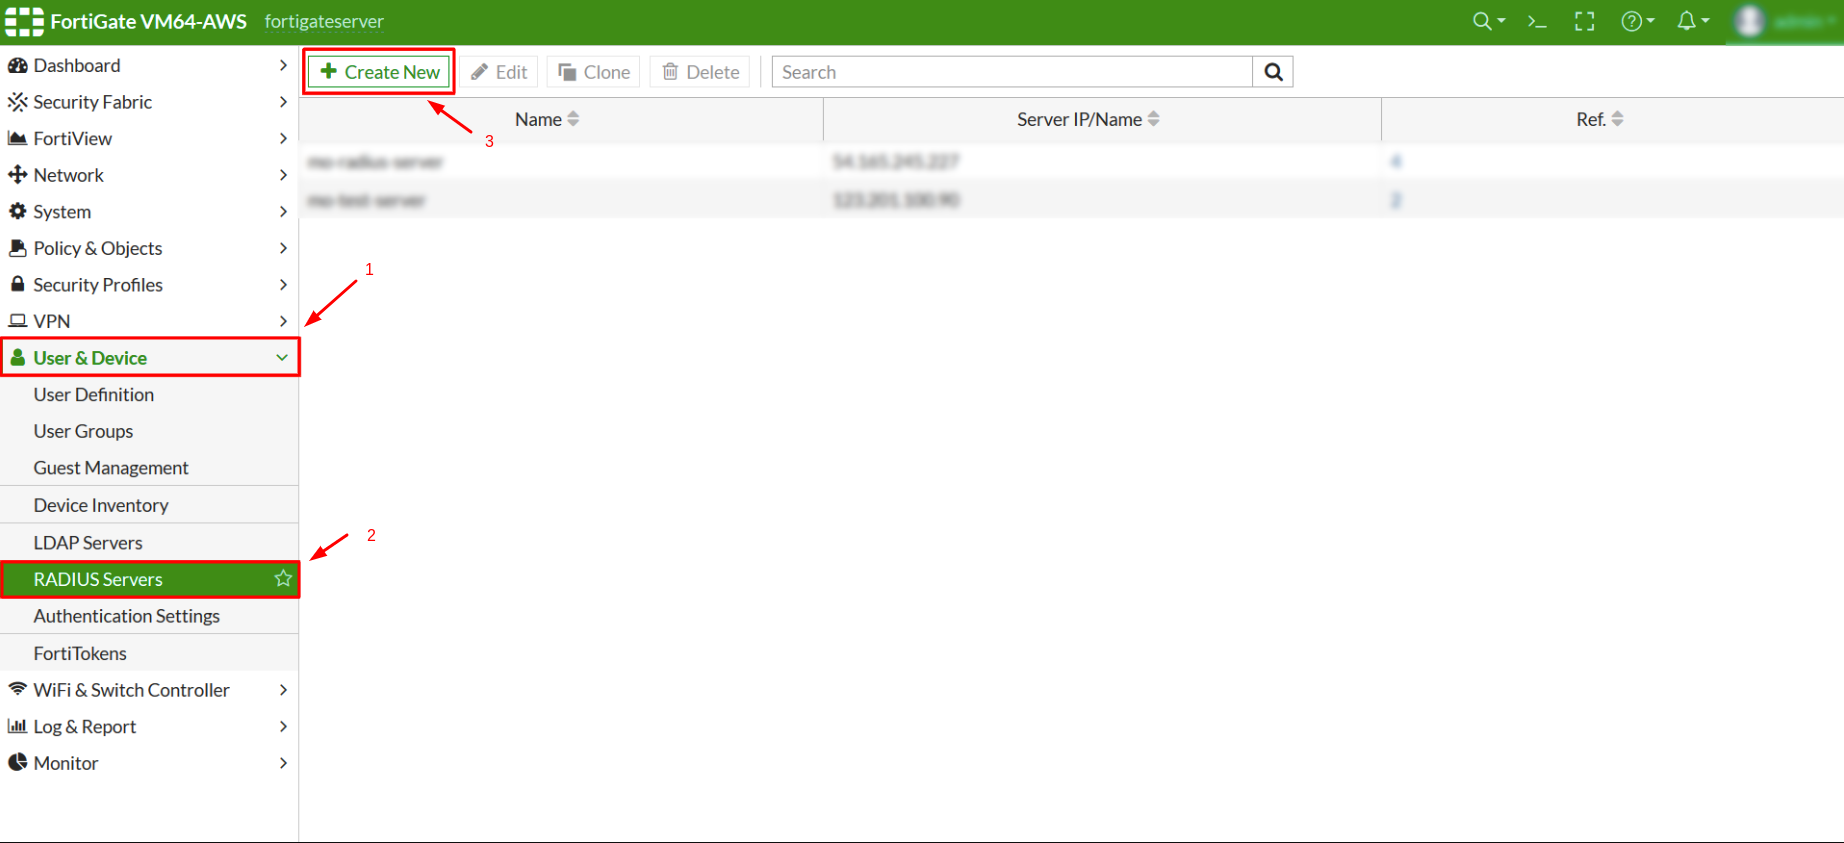
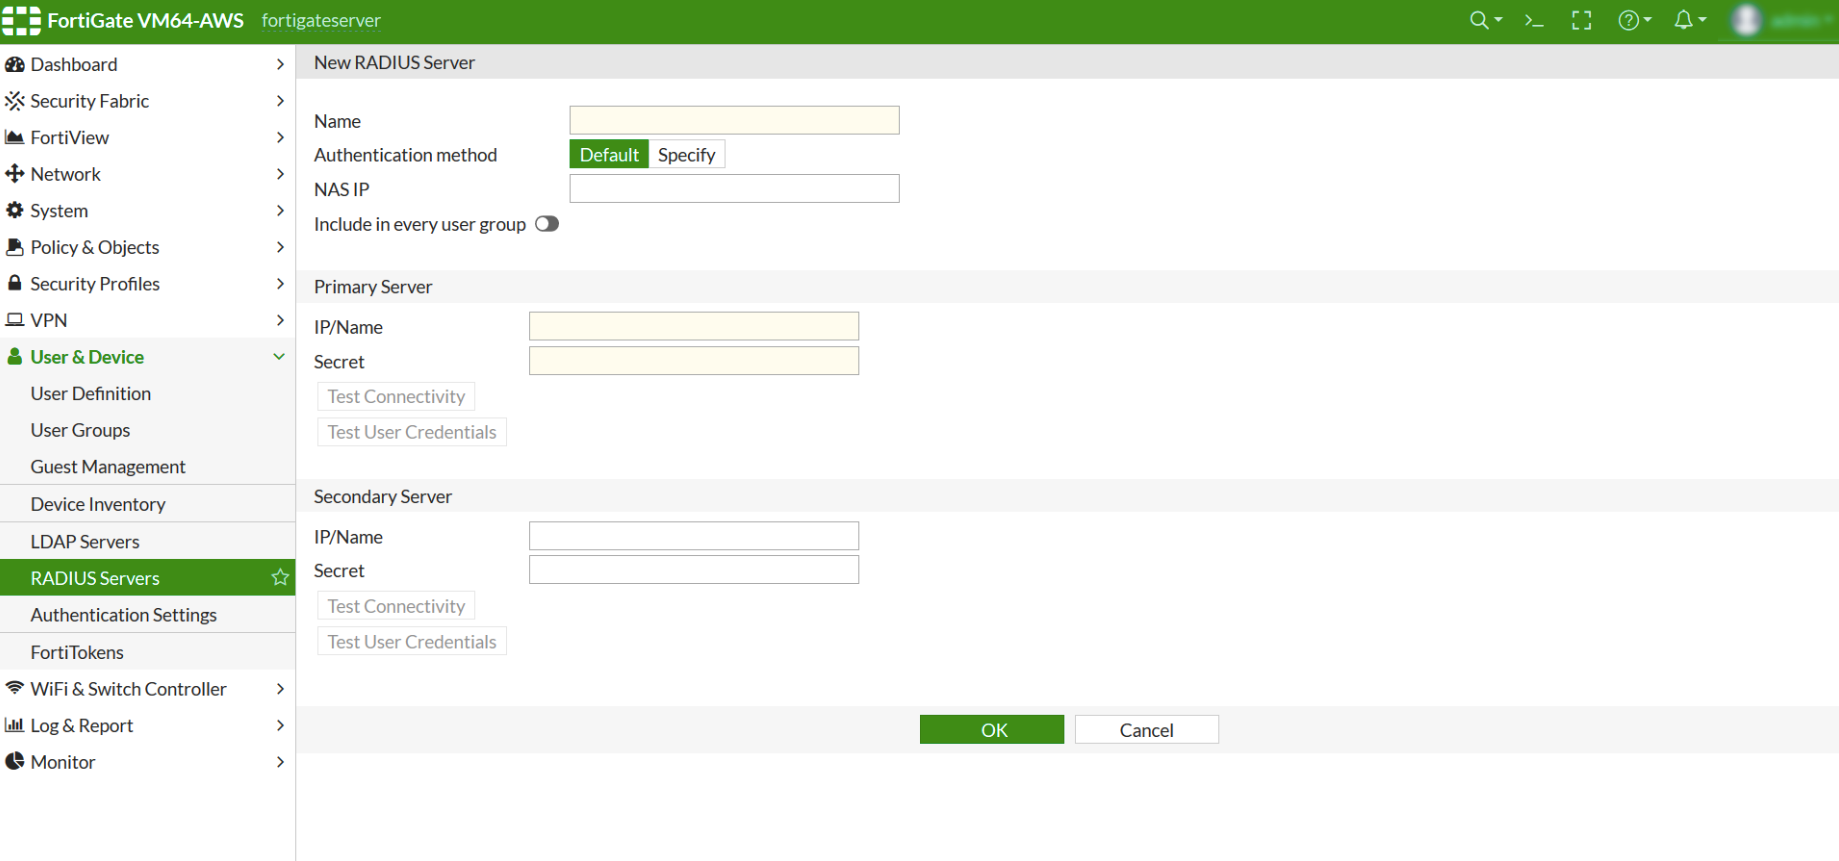
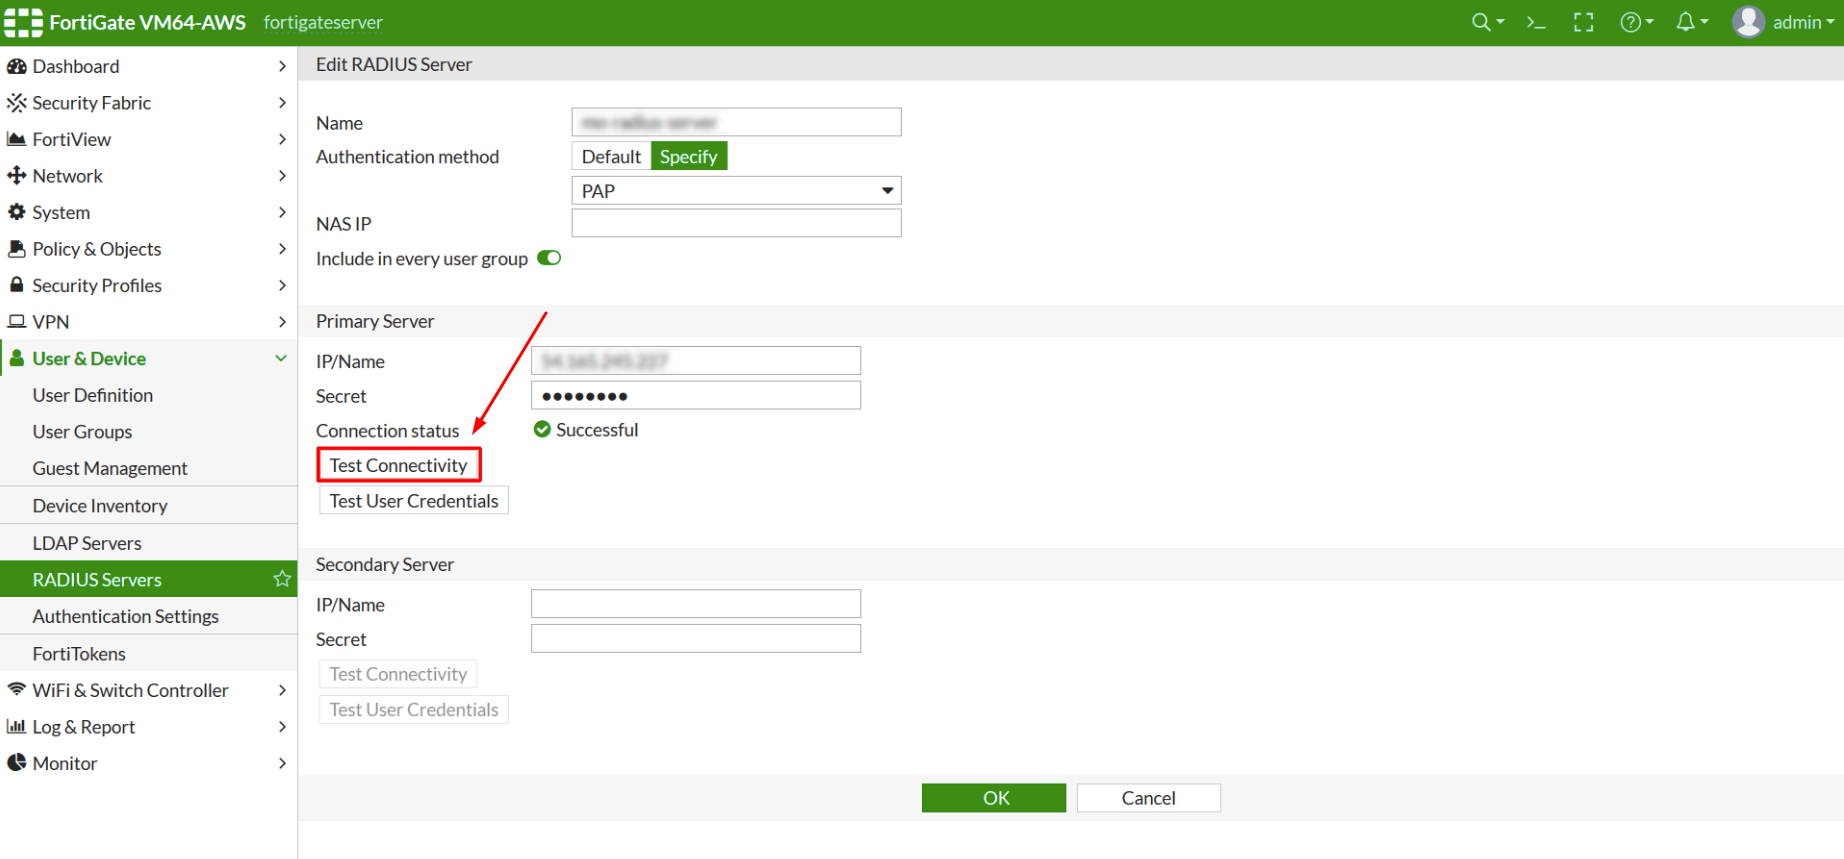
| Name | Come up with a name for your RADIUS server. |
| Authentication Method | Click on Specify and then select PAP from the dropdown menu. |
| Primary Server IP / Name | IP of server where the Protectimus RADIUS Server component is installed |
| Primary Server Secret | Indicate the shared secret you created in the Protectimus radius.yml file (radius.secret property) when configuring Protectimus RADIUS Server |
| Secondary Server IP / Name | Optional |
| Secondary Server Secret | Optional |
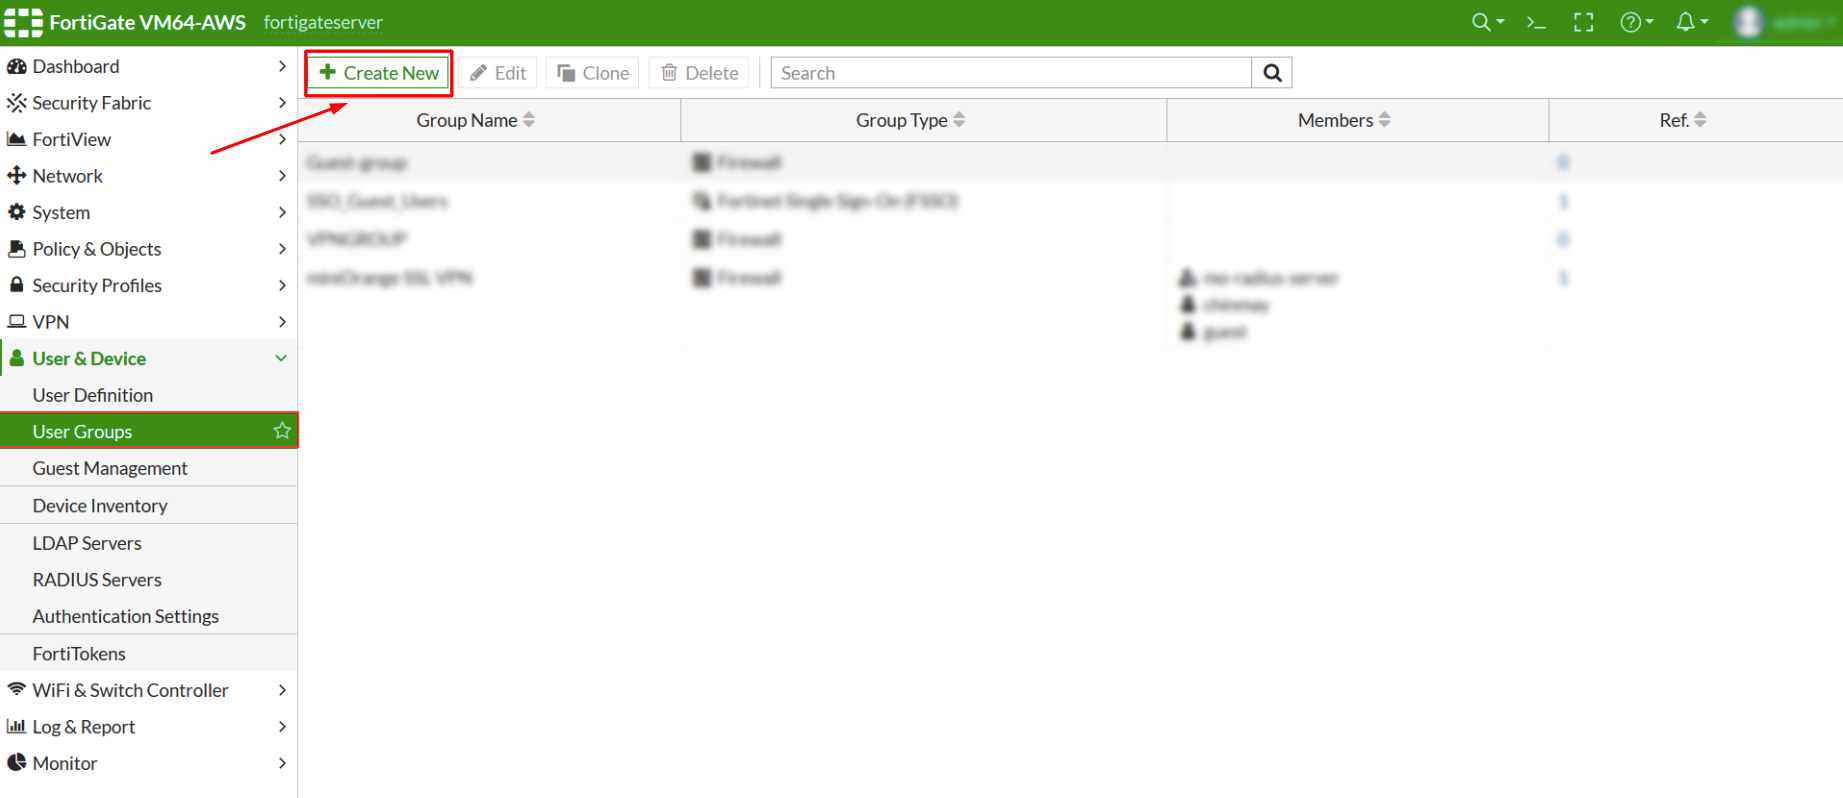
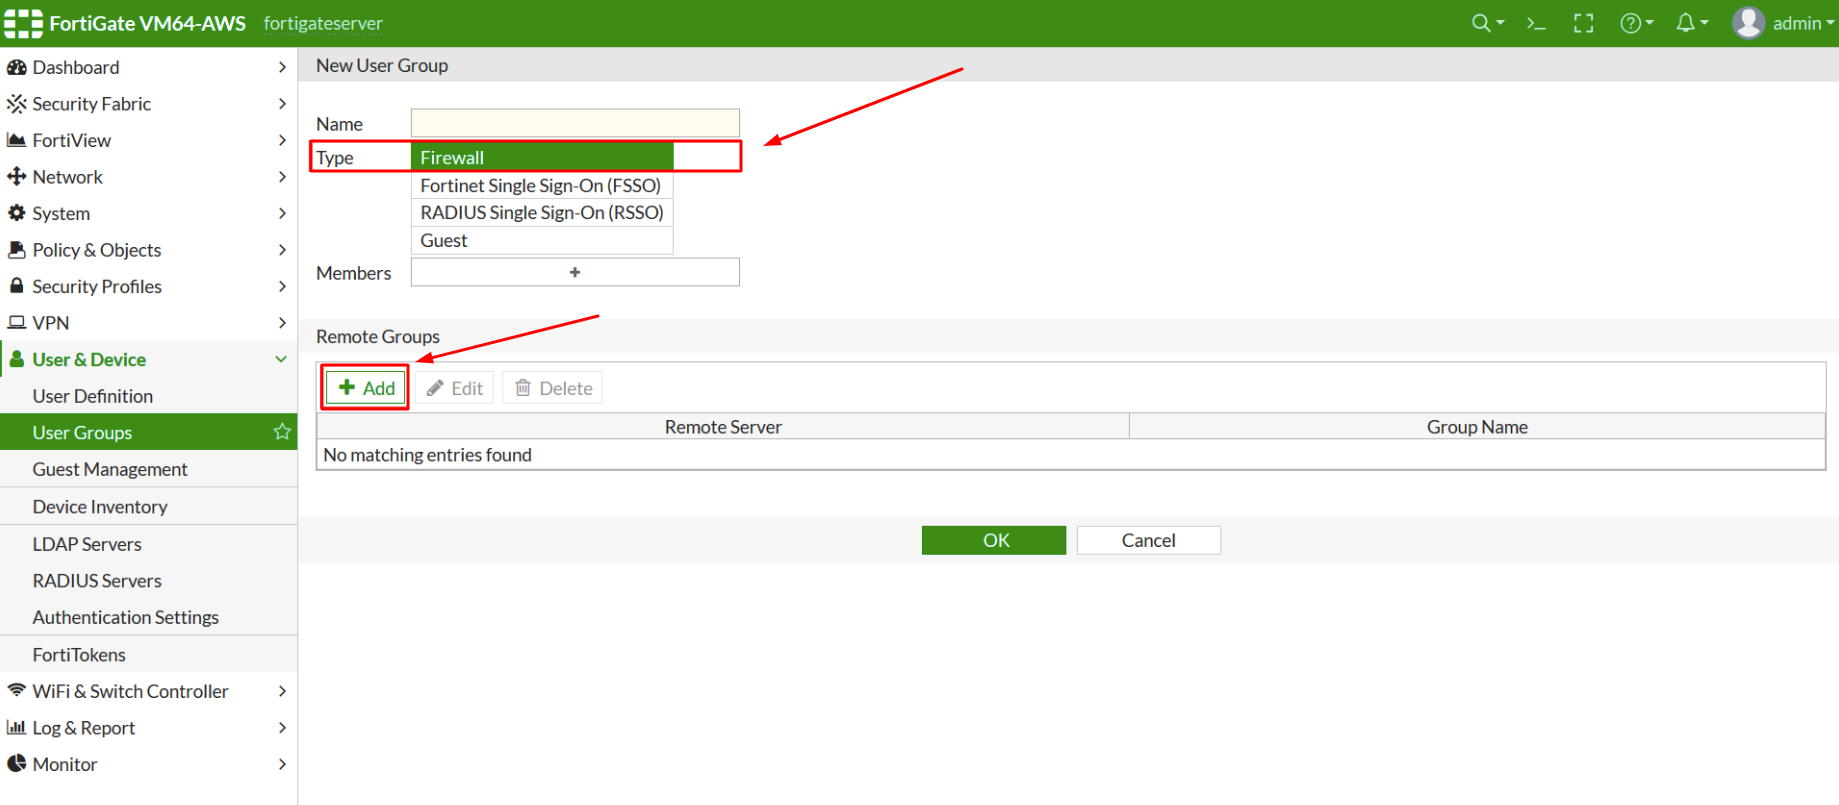
PLEASE NOTE! Use an IPsec Wizard to add a new IPSec Tunnel if there is no configured one.
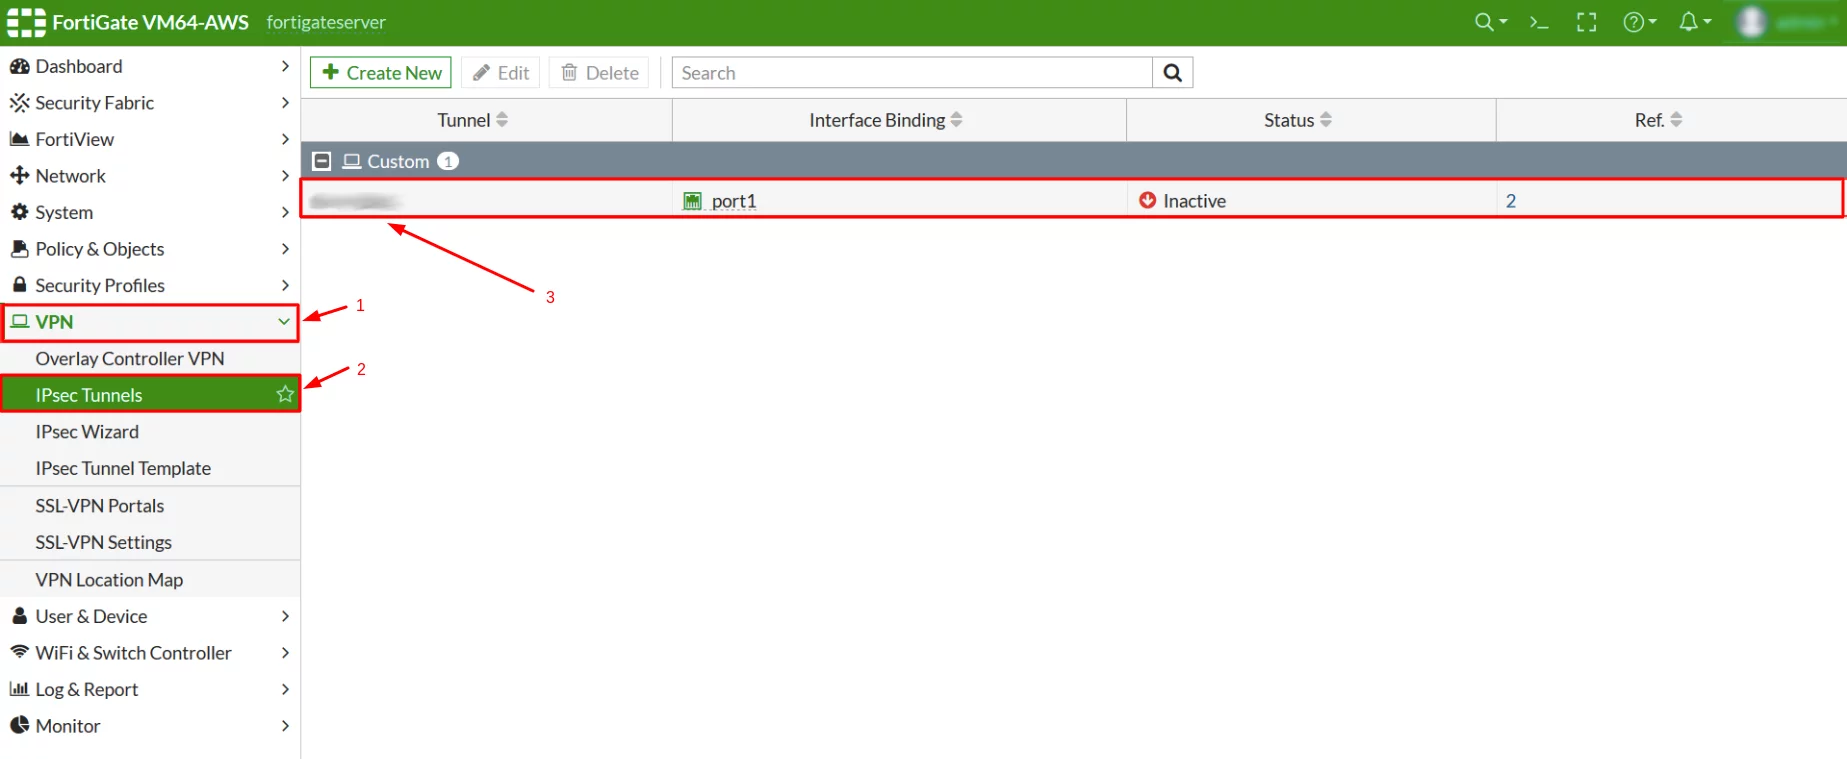
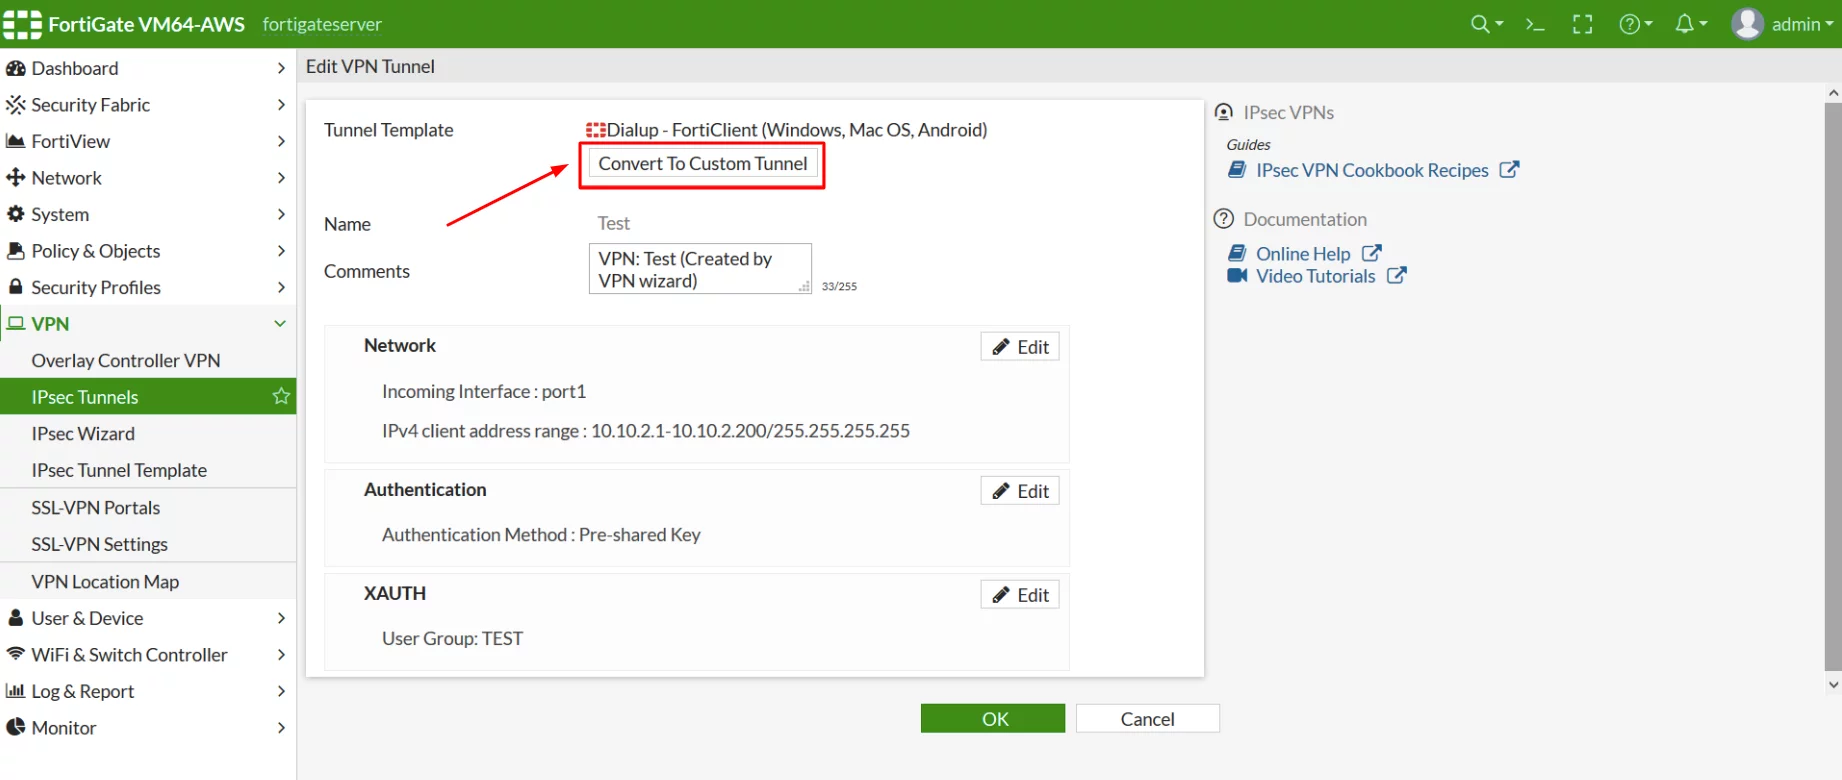
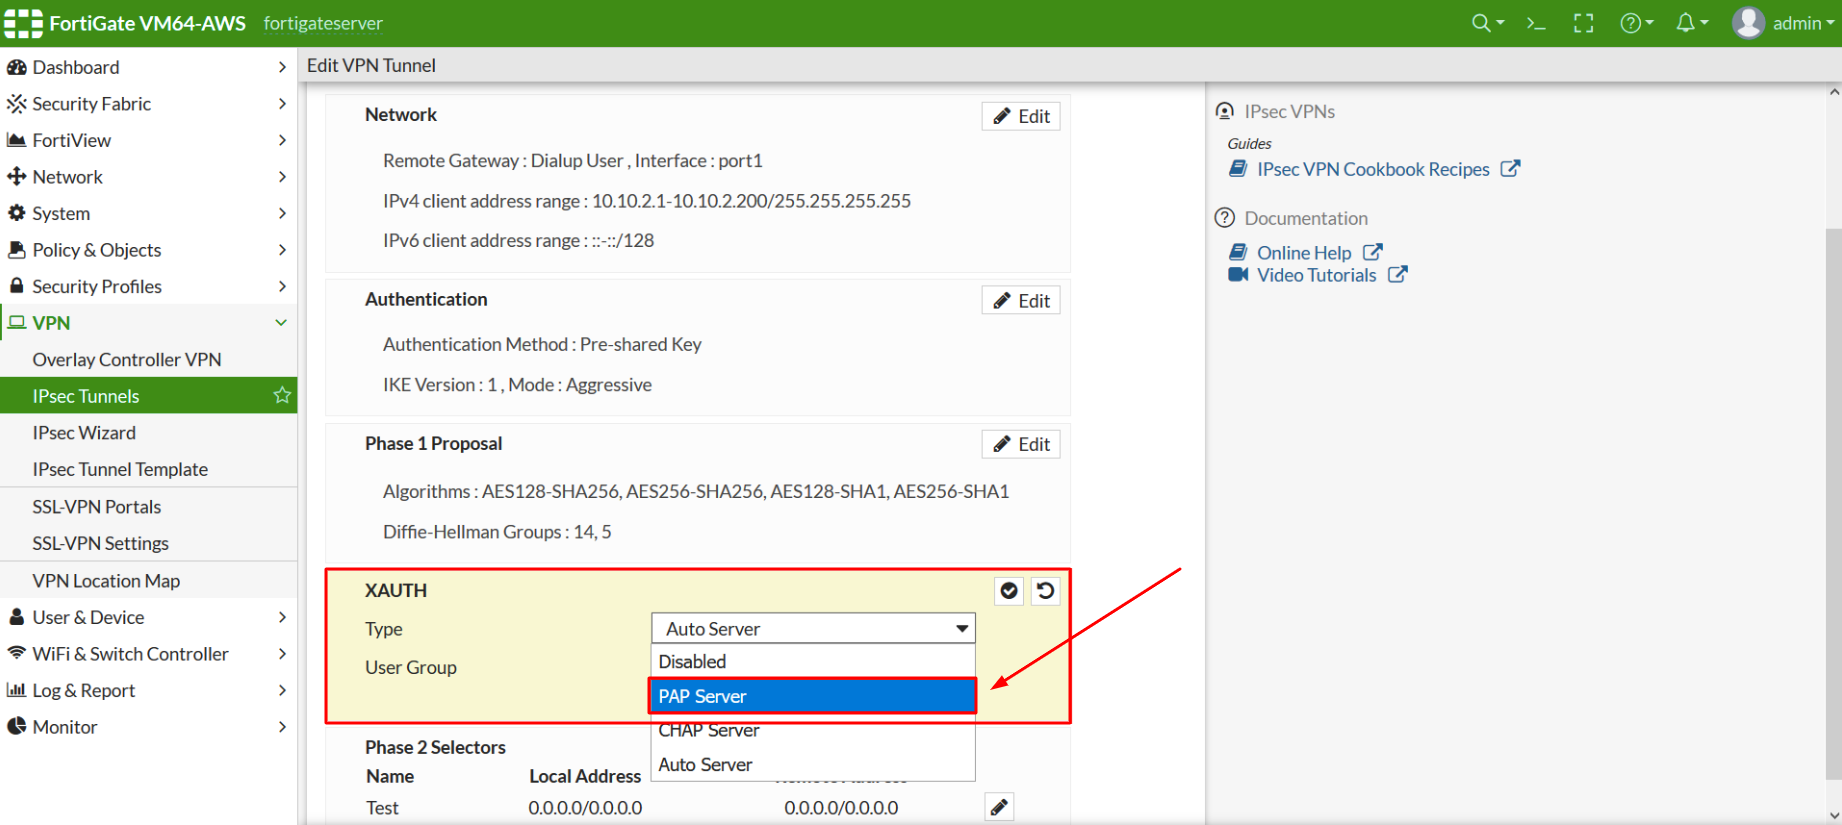
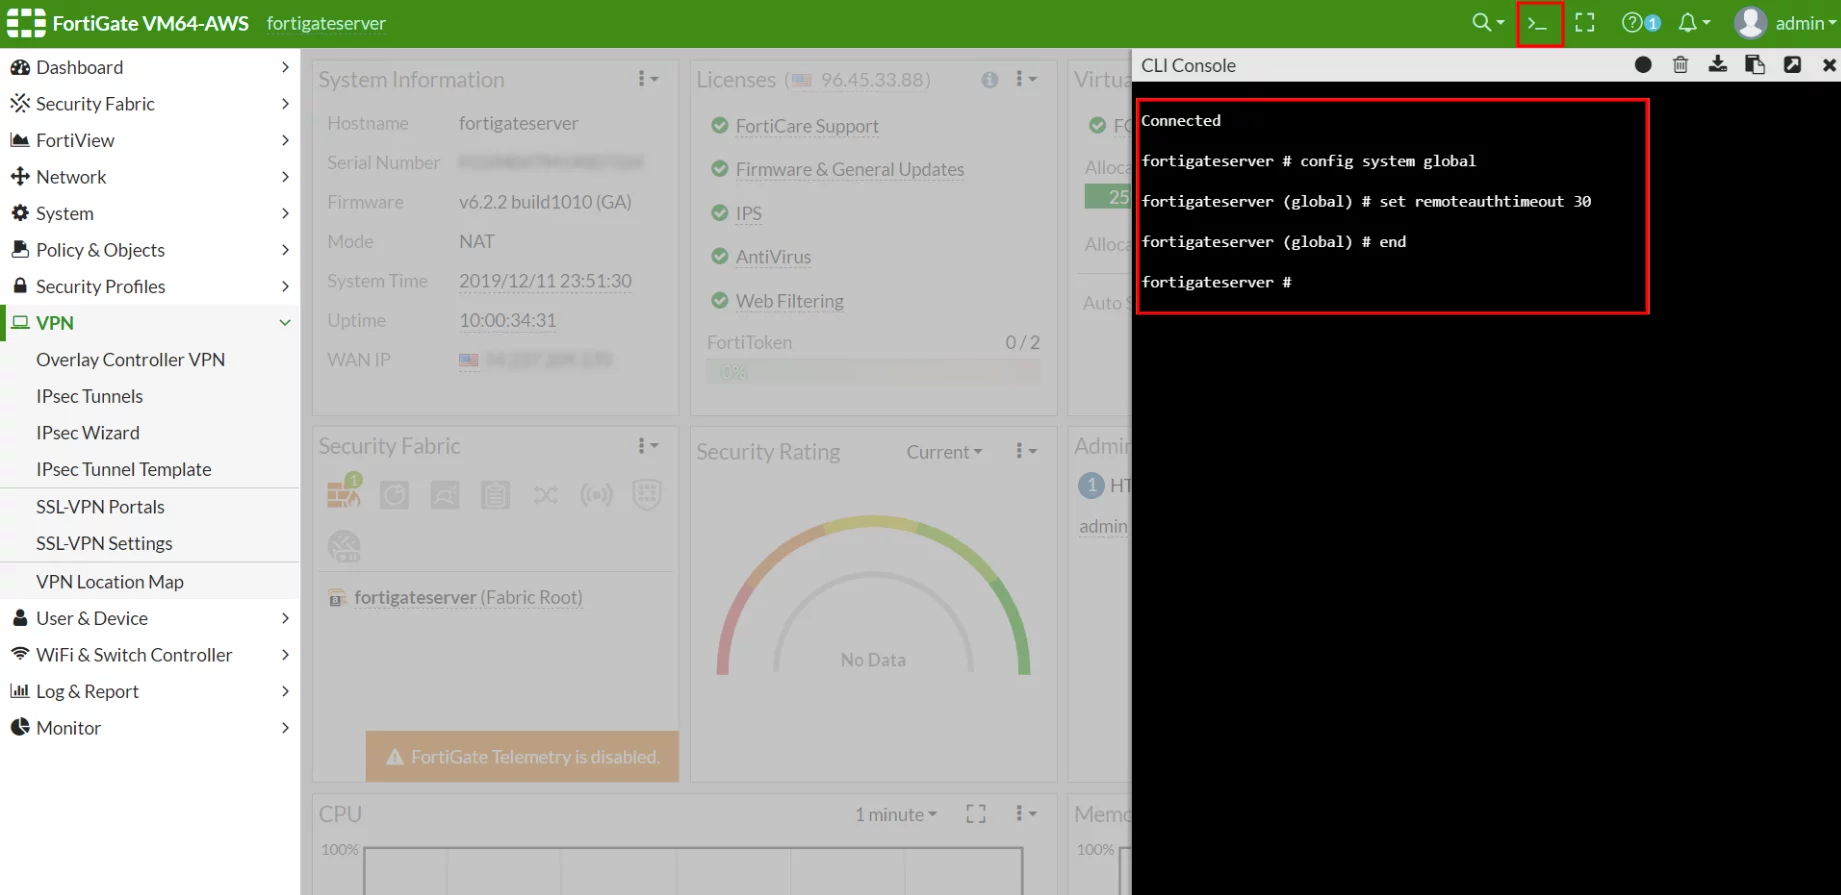
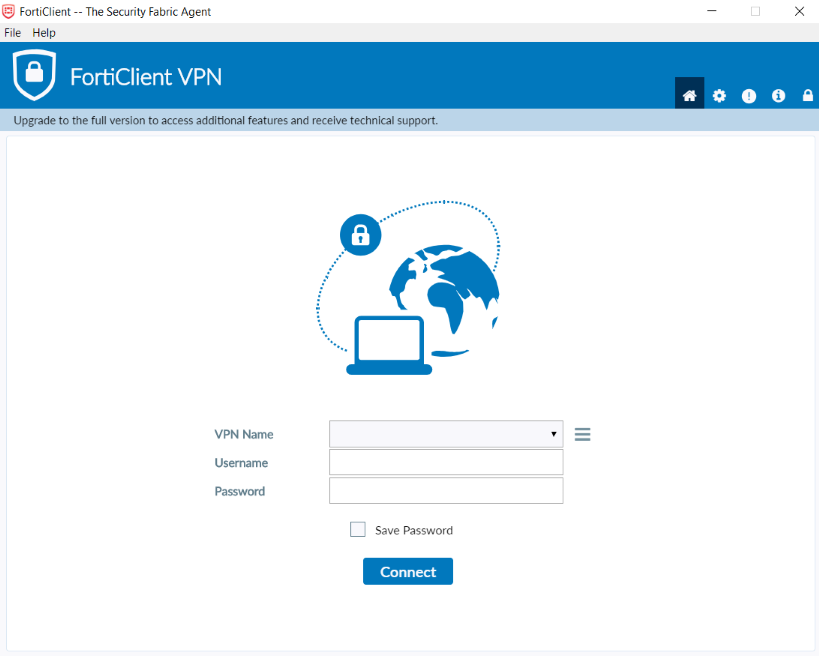
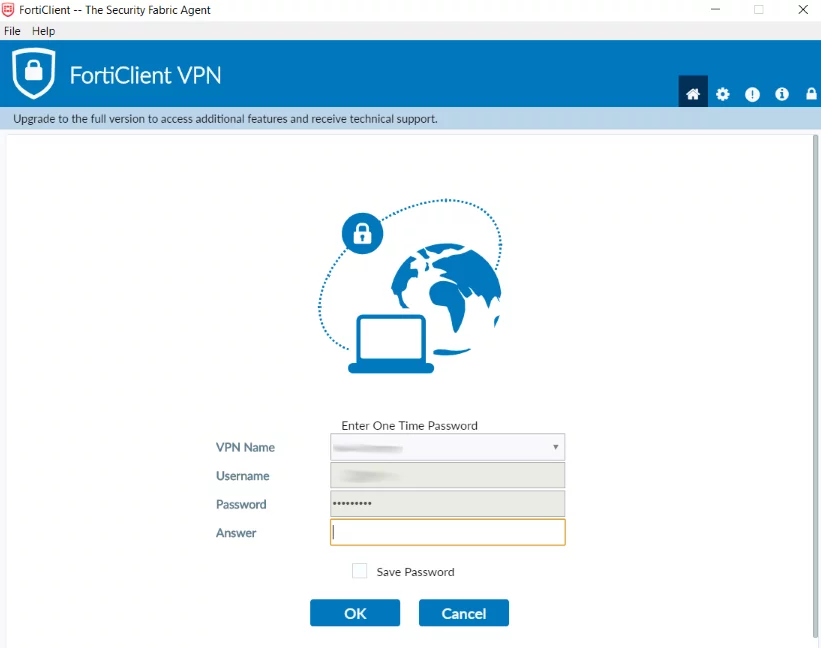
PLEASE NOTE! When you confige an IPSec VPN connection in FortiClient use the Pre-Shared key of the IPSec Tunnel that was created LAST. Fortinet may have issues if multiple IPSec Tunnels are present at FortiGate Server.
Integration of Fortinet FortiGate VPN 2FA is now complete.
If you have other questions, contact Protectimus customer support service.
Protectimus Ltd
Carrick house, 49 Fitzwilliam Square,
Dublin D02 N578, Ireland
Ireland: +353 19 014 565
USA: +1 786 796 66 64
Protectimus Ltd
Carrick house, 49 Fitzwilliam Square,
Dublin D02 N578, Ireland
Ireland: +353 19 014 565
USA: +1 786 796 66 64


