Programmable hardware TOTP token in a card format that fits any authentication system
Classic hardware TOTP token with SHA-1 algorithm support
Programmable hardware TOTP token in a key fob format that fits any authentication system
Classic hardware TOTP token with SHA-256 algorithm support
Programmable hardware TOTP token in a card format that fits any authentication system
Classic hardware TOTP token with SHA-1 algorithm support
Programmable hardware TOTP token in a key fob format that fits any authentication system
Classic hardware TOTP token with SHA-256 algorithm support
A free 2FA authenticator app with cloud backup, easy token transfer to a new phone, PIN and biometric authentication protection
Free OTP delivery with chatbots in messaging apps
Delivery of one-time passwords via SMS messages
Free delivery of one-time passwords via email
Free one-time passwords delivery via push notifications
Guides
This guide shows how to set up Windows VPN 2FA (two-factor authentication) using Protectimus multi-factor authentication system. After integrating Windows VPN with the Protectimus MFA system, to connect to Windows VPN, users will need to pass two stages of authentication:
To generate one-time passcodes, the following types of two-factor authentication tokens will be available to your users: a 2FA application on a smartphone; delivery of one-time codes via Telegram, Viber, and Facebook Messenger; physical TOTP tokens; delivery of one-time codes by e-mail or SMS.
It is almost impossible to hack a standard password and a one-time password simultaneously. Therefore, two-factor authentication is a must-have element in protecting Windows VPN user accounts from unauthorized access and hacking using attacks such as phishing, brute force, keyloggers, social engineering, and the like.
This guide shows you how to set up two-factor authentication for Windows VPN using Protectimus Cloud-Based Two-Factor Authentication Service or Protectimus On-Premise 2FA Platform and RRAS component. RRAS integration with Protectimus via the RADIUS authentication protocol is required.
The scheme of work of the Protectimus two-factor authentication solution for Windows VPN is shown below.
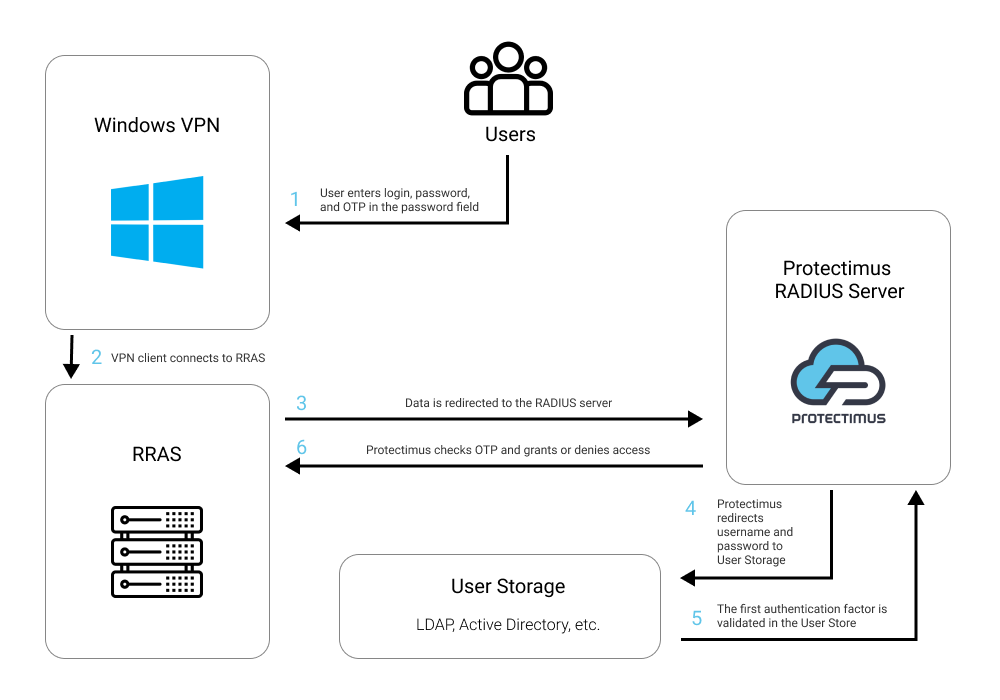
You can set up Windows VPN two-factor authentication (2FA) with Protectimus using the RADIUS protocol:
- Get registered with Protectimus SAAS Service or install the On-Premise 2FA Platform and configure basic settings.
- Install and configure Protectimus RADIUS Server.
- Install and configure RRAS.
- Configure Windows VPN authentication policies.
Detailed instructions for installing and configuring the Protectimus RADIUS Server for Windows VPN 2-factor authentication using RADIUS are available in our Protectimus RADIUS Server Installation Guide for Windows VPN 2FA.
Specify “inline-mode” in the configuration file. In the “auth” section, add the following settings (you may specify any separator):
inline-mode:
  enabled: true
  separator: ‘,’
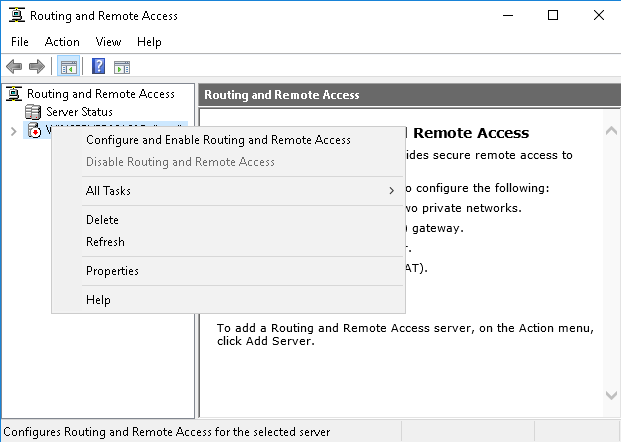
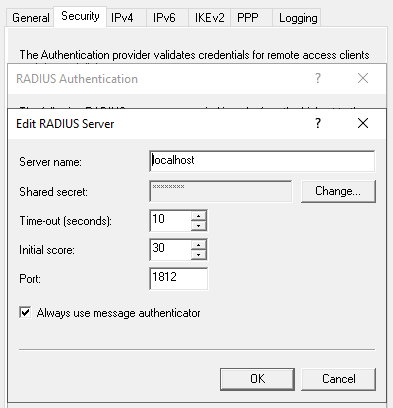
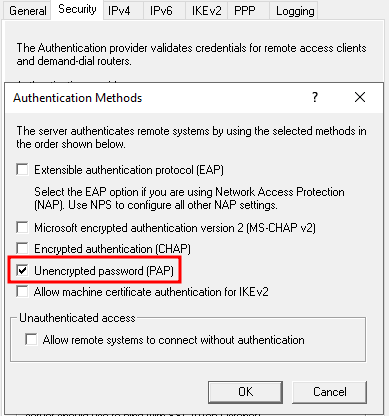
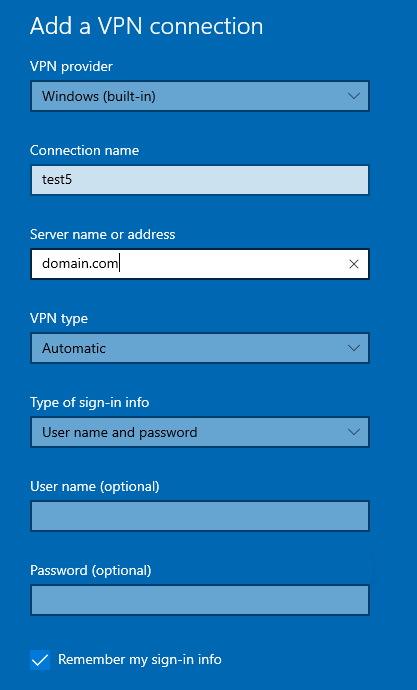
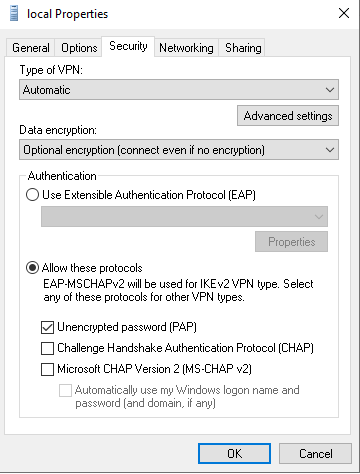
The integration of two-factor authentication into Windows VPN is complete.
If you have questions, please contact Protectimus Support.
Protectimus Ltd
Carrick house, 49 Fitzwilliam Square,
Dublin D02 N578, Ireland
Ireland: +353 19 014 565
USA: +1 786 796 66 64
Protectimus Ltd
Carrick house, 49 Fitzwilliam Square,
Dublin D02 N578, Ireland
Ireland: +353 19 014 565
USA: +1 786 796 66 64


