Програмований апаратний TOTP-токен у форматі карти
Класичні апаратні TOTP-токени SHA-1 з попередньо встановленими секретними ключами
Програмований апаратний TOTP-токен у форматі брелока
Класичний апаратний TOTP-токен з підтримкою алгоритму SHA-256
Програмований апаратний TOTP-токен у форматі карти
Класичні апаратні TOTP-токени SHA-1 з попередньо встановленими секретними ключами
Програмований апаратний TOTP-токен у форматі брелока
Класичний апаратний TOTP-токен з підтримкою алгоритму SHA-256
Безкоштовний застосунок для двофакторної автентифікації з хмарним бекапом, простим перенесенням токенів на новий телефон, PIN-кодом і біометричною автентифікацією
Безкоштовна доставка OTP через чат-ботів у месенджерах
Доставка одноразових паролів за допомогою SMS-повідомлень
Безкоштовна доставка одноразових паролів електронною поштою
Доставка одноразових паролів через push-повідомлення
Інструкції
У цій інструкції ви дізнаєтесь, як налаштувати двофакторну автентифікацію (2FA) для Check Point VPN через RADIUS, використовуючи рішення для багатофакторної автентифікації від Protectimus, щоб підвищити рівень безпеки вашої VPN-мережі.
Двофакторна автентифікація (2FA) захистить облікові записи ваших користувачів, а отже, й вашу корпоративну інфраструктуру від несанкціонованого доступу. Активуючи 2FA для Check Point VPN, ви захищаєте облікові записи користувачів від фішингу, брутфорсу, підробки даних, кейлогерів, атак типу «людина посередині», соціальної інженерії та багатьох інших кіберзагроз.
Двофакторна автентифікація передбачає використання двох різних методів автентифікації для доступу до облікового запису Check Point, захищеного 2FA.
Отже, коли увімкнена двофакторна автентифікація (2FA) для Check Point VPN, стає надзвичайно складно зламати обидва паролі одночасно, особливо враховуючи, що одноразовий пароль дійсний лише протягом 30 секунд.
Ця інструкція показує, як налаштувати двофакторну автентифікацію (2FA) для Check Point через протокол автентифікації RADIUS, використовуючи хмарний сервіс двофакторної автентифікації Protectimus або локальну платформу 2FA Protectimus.
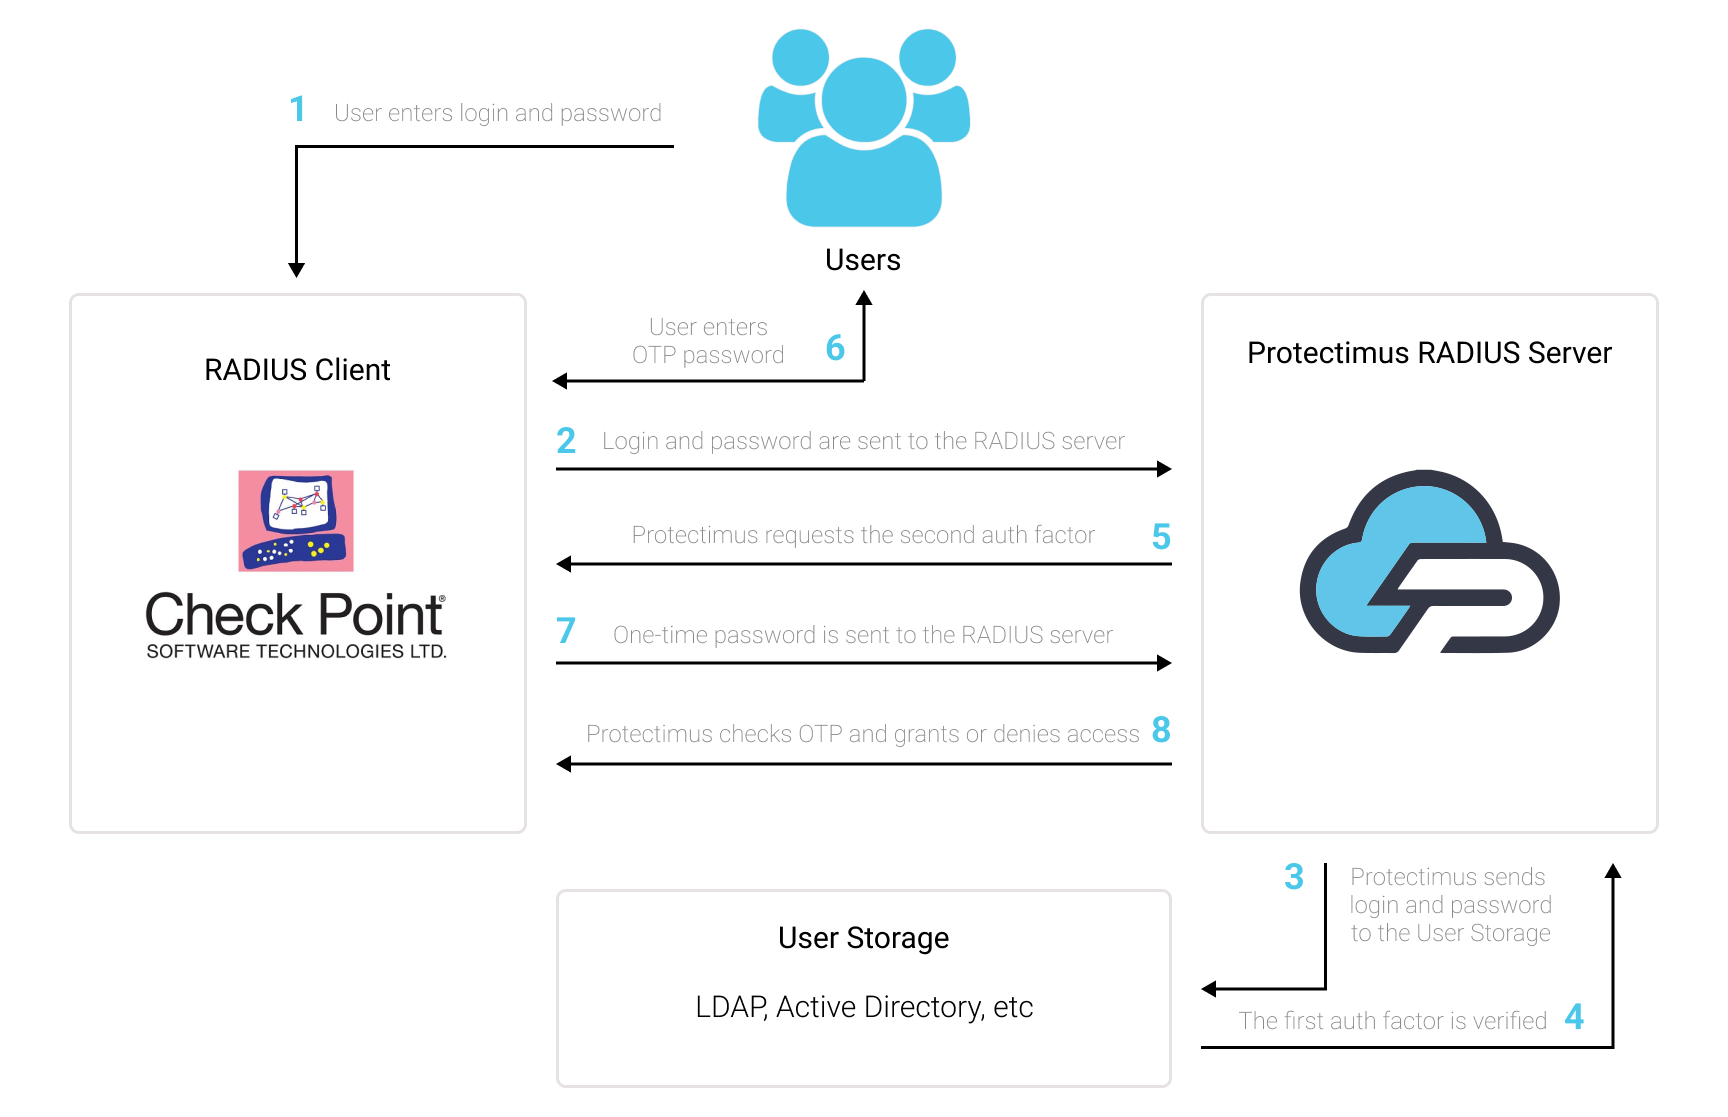
Ви можете налаштувати двофакторну автентифікацію (2FA) для Check Point VPN за допомогою протоколу RADIUS, використовуючи рішення Protectimus:
- Зареєструйтесь у SAAS сервісі Protectimus або встановіть локальну платформу Protectimus та налаштуйте основні параметри.
- Встановіть та налаштуйте Protectimus RADIUS Server.
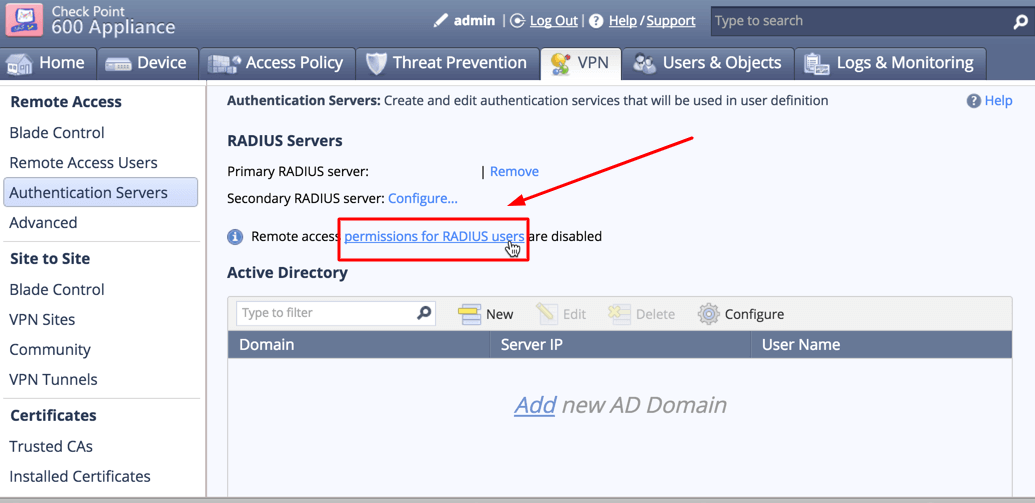
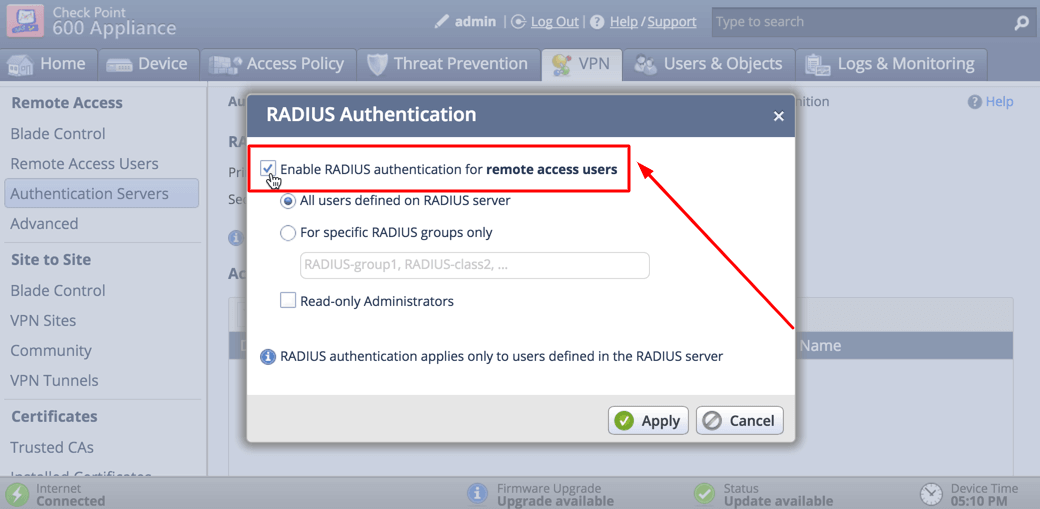
- Налаштуйте політики автентифікації в Check Point VPN.
Детальні інструкції з установки та налаштування Protectimus RADIUS Server для двофакторної автентифікації (2FA) в Check Point VPN за допомогою RADIUS доступні в нашому Посібнику з налаштування Protectimus RADIUS Server для 2FA Check Point VPN.
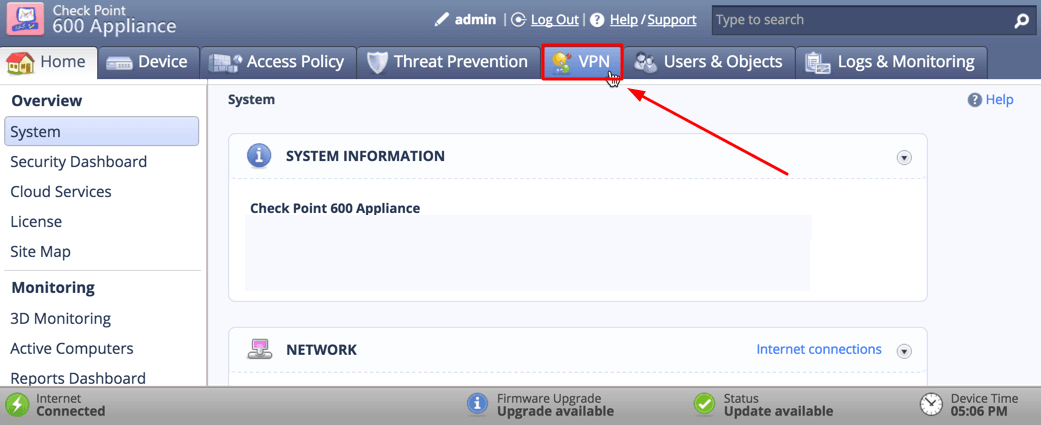
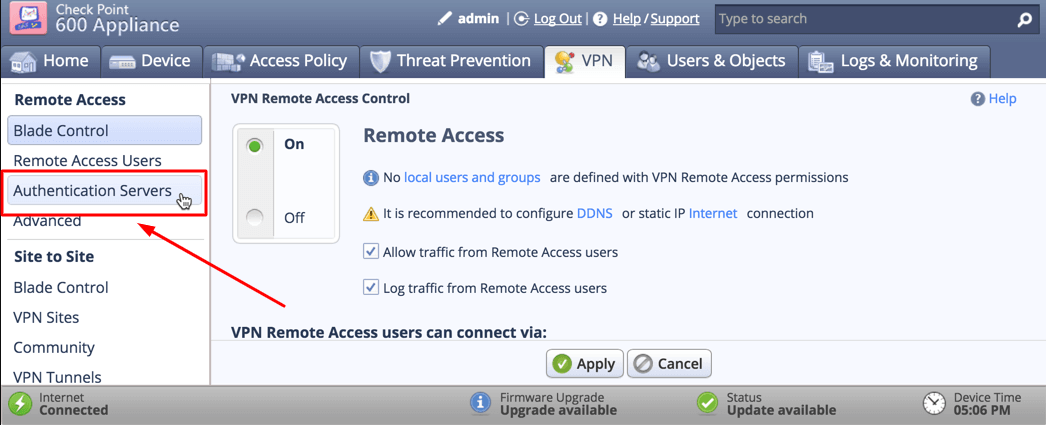
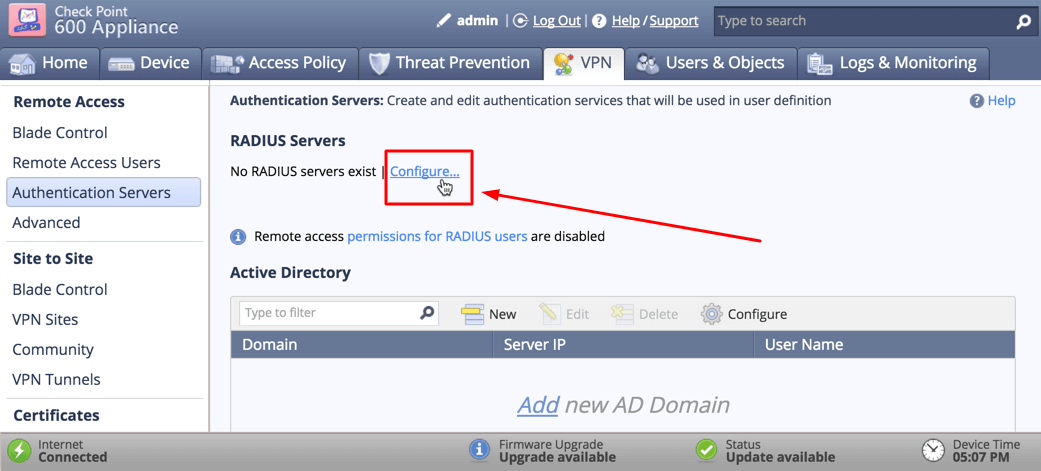
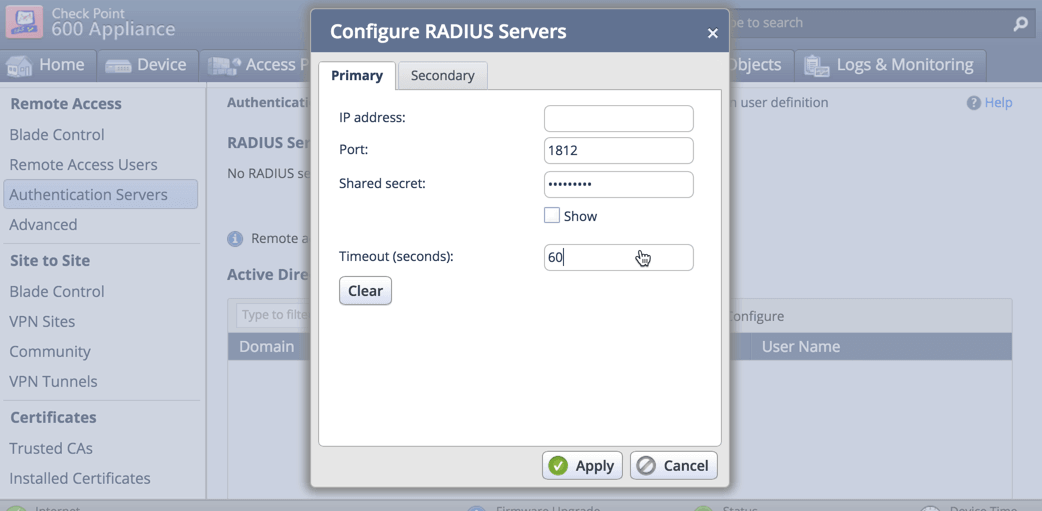
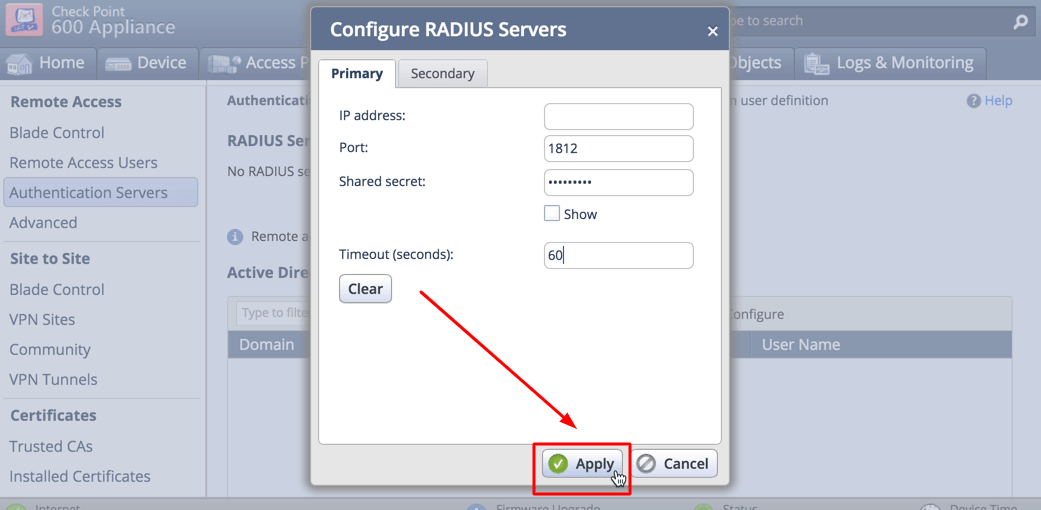
| IP address | IP-адреса сервера, на якому встановлений компонент Protectimus RADIUS Server. |
| Port | Вкажіть порт 1812 (або той, який ви налаштували у файлі radius.yml під час конфігурації Protectimus RADIUS Server). |
| Shared Secret | Вкажіть секретний ключ, який ви створили в файлі radius.yml (властивість radius.secret) під час налаштування Protectimus RADIUS Server. |
| Timeout (in seconds) | Встановіть значення 60 секунд. |
Інтеграція двофакторної автентифікації (2FA/MFA) для вашого Check Point VPN завершена.
Якщо у вас є запитання, зверніться до служби підтримки клієнтів Protectimus.
Protectimus Ltd
Carrick house, 49 Fitzwilliam Square,
Dublin D02 N578, Ireland
Ірландія: +353 19 014 565
США: +1 786 796 66 64
Protectimus Ltd
Carrick house, 49 Fitzwilliam Square,
Dublin D02 N578, Ireland
Ірландія: +353 19 014 565
США: +1 786 796 66 64


