Автентифікація та верифікація
Класична 2FA / MFA
Класична 2FA / MFA
Автентифікація для Wi-Fi
Електронна верифікація відвідувань (EVV)
Автентифікація та верифікація
Класична 2FA / MFA
Класична 2FA / MFA
Автентифікація для Wi-Fi
Електронна верифікація відвідувань (EVV)
Популярні інтеграції
Популярні інтеграції
Програмований апаратний TOTP-токен у форматі карти
Класичні апаратні TOTP-токени SHA-1 з попередньо встановленими секретними ключами
Програмований апаратний TOTP-токен у форматі брелока
Класичний апаратний TOTP-токен з підтримкою алгоритму SHA-256
Програмований апаратний TOTP-токен у форматі карти
Класичні апаратні TOTP-токени SHA-1 з попередньо встановленими секретними ключами
Програмований апаратний TOTP-токен у форматі брелока
Класичний апаратний TOTP-токен з підтримкою алгоритму SHA-256
Безкоштовний застосунок для двофакторної автентифікації з хмарним бекапом, простим перенесенням токенів на новий телефон, PIN-кодом і біометричною автентифікацією
Безкоштовна доставка OTP через чат-ботів у месенджерах
Доставка одноразових паролів за допомогою SMS-повідомлень
Безкоштовна доставка одноразових паролів електронною поштою
Доставка одноразових паролів через push-повідомлення
Початок роботи
Класична 2FA / MFA
Документація API
Комплекти для розробки програмного забезпечення (SDK)
Початок роботи
Класична 2FA / MFA
Документація API
Комплекти для розробки програмного забезпечення (SDK)
Інструкції
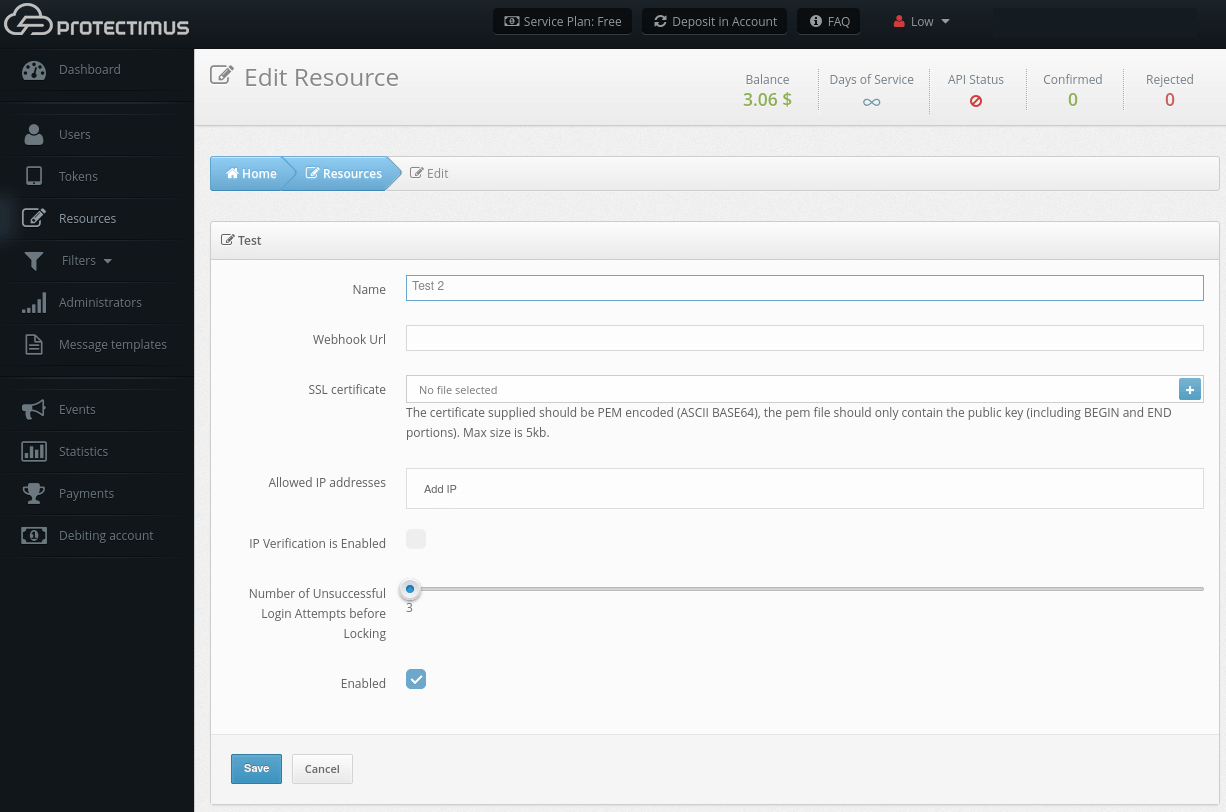
Ресурси використовуються для групування користувачів. Наприклад, якщо потрібно захистити користувачів різних веб-проектів або співробітників різних відділів, ви можете додати кілька ресурсів.
Кількість ресурсів (проектів), які ви можете створити, залежить від обраного тарифного плану. Якщо потрібно створити більше ресурсів, оберіть необхідну кількість, налаштувавши відповідний План обслуговування.
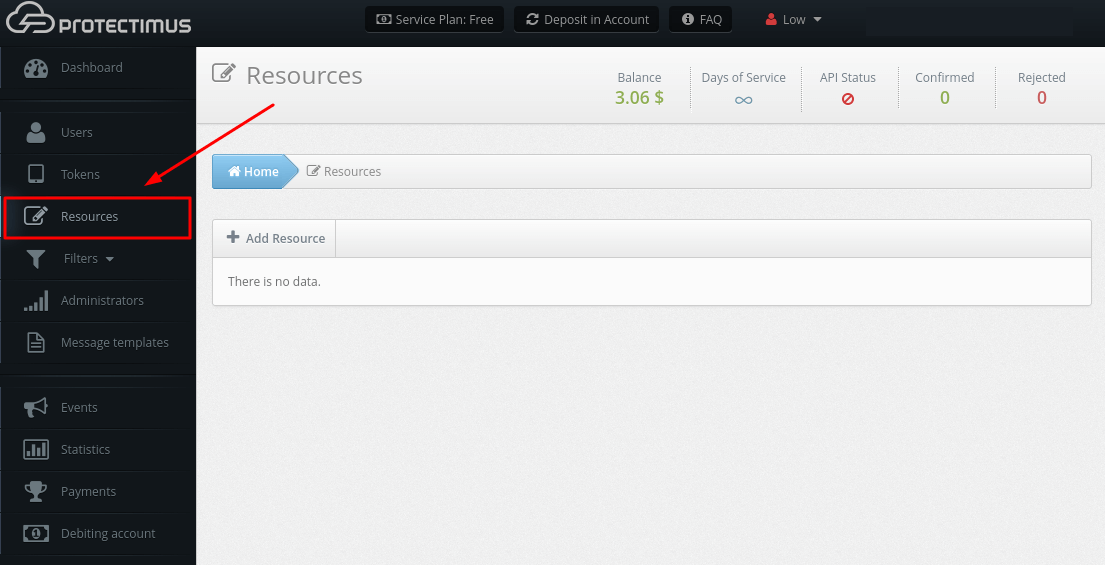
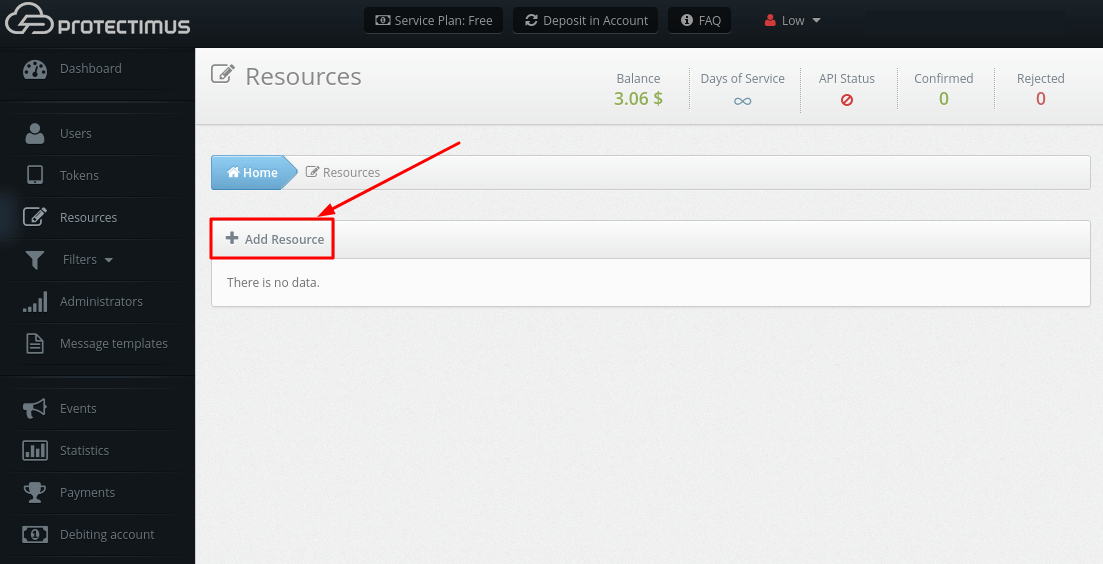
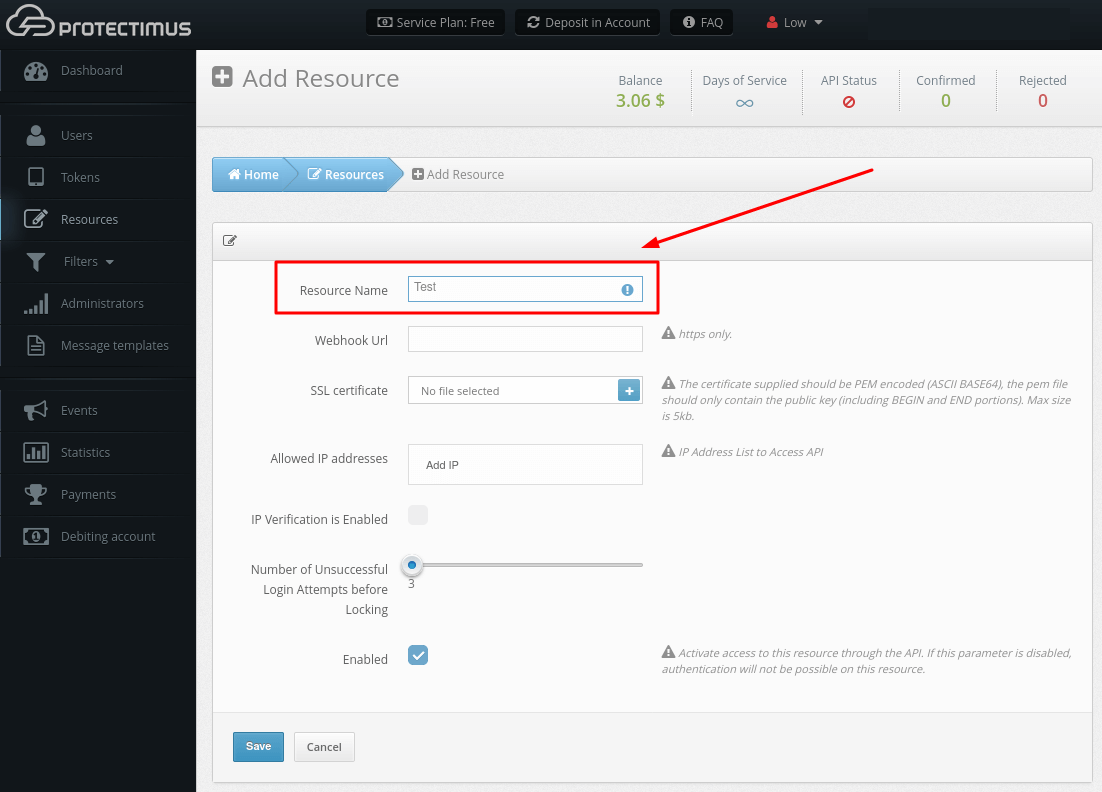

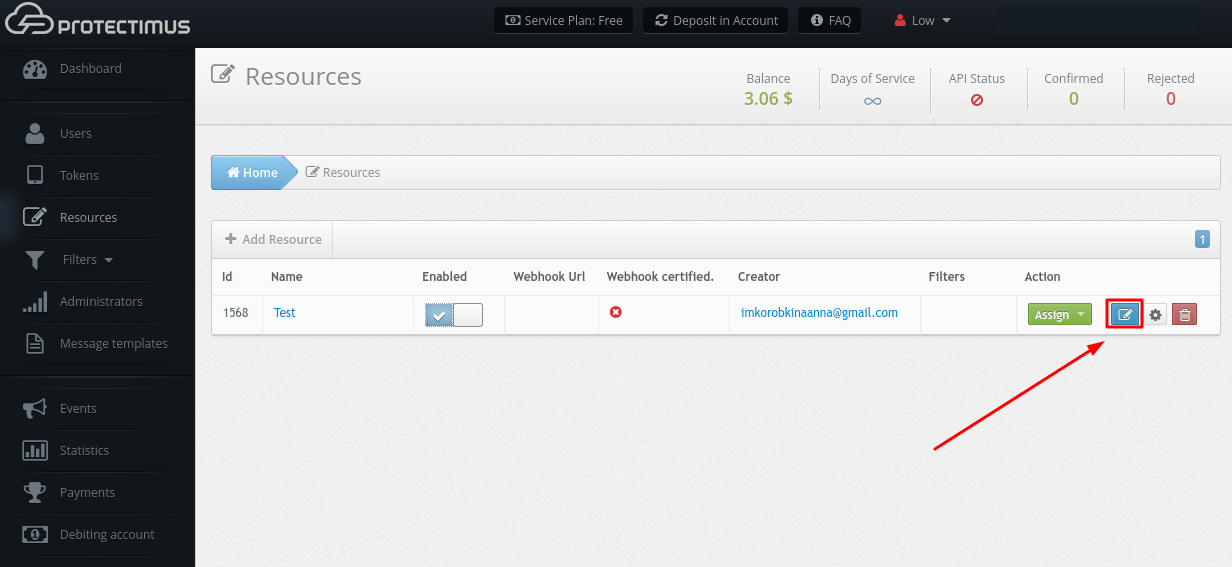
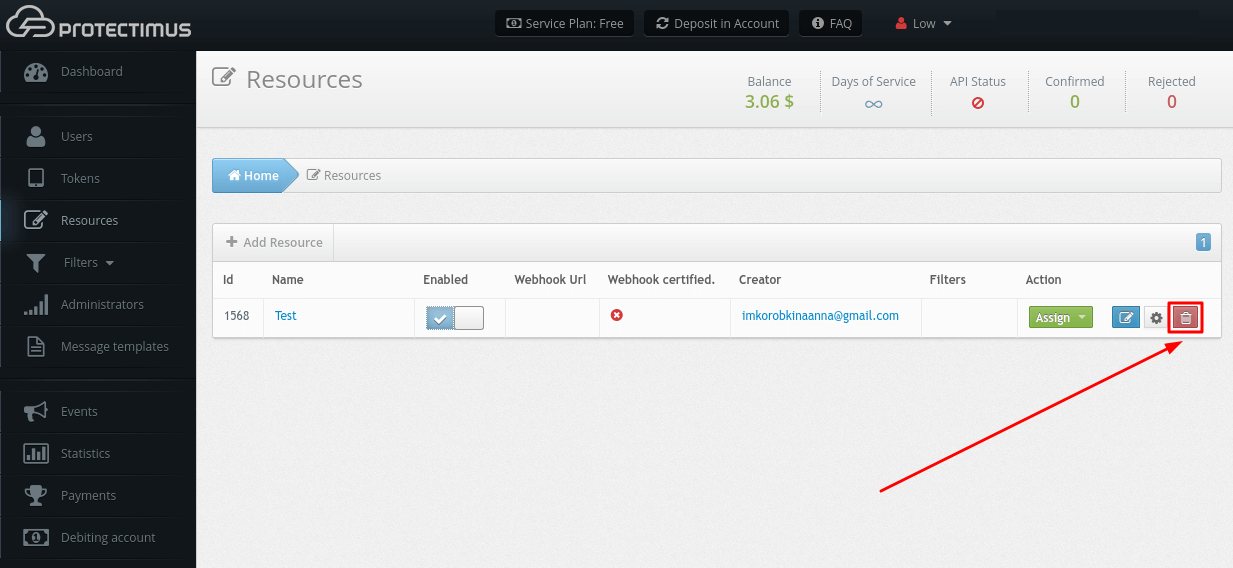
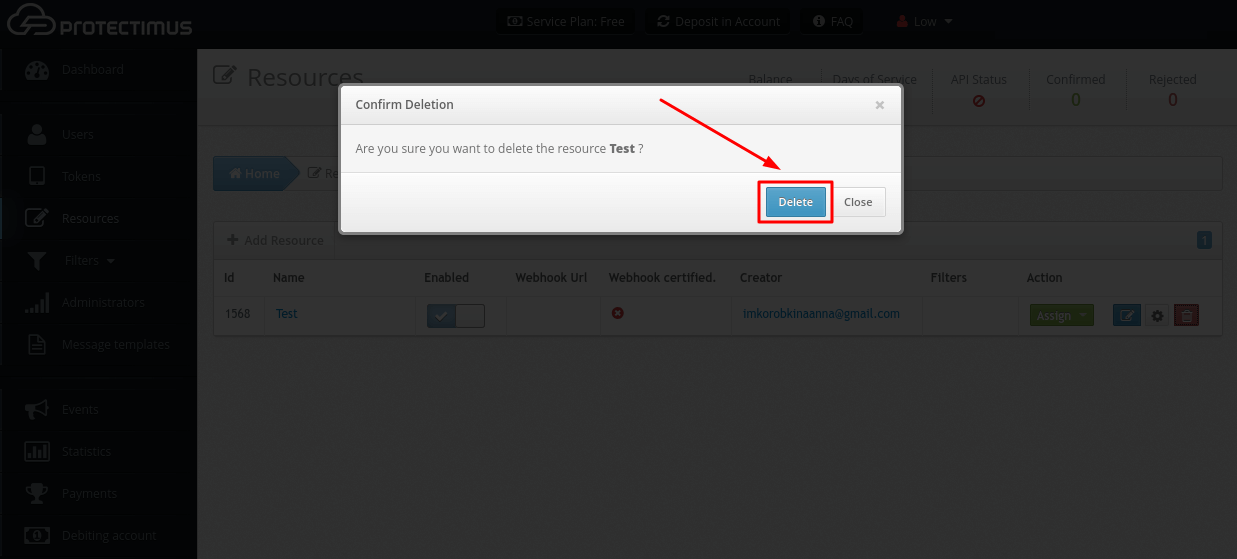
Ресурс може бути видалений лише адміністратором, який його створив, або головним адміністратором системи MFA Protectimus.

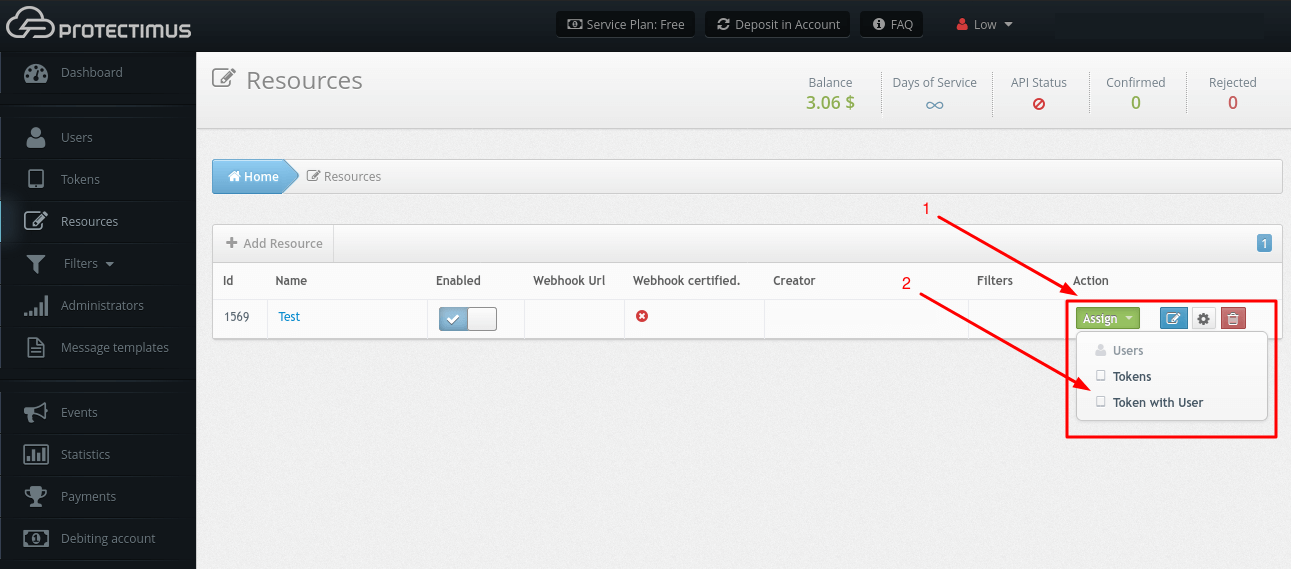
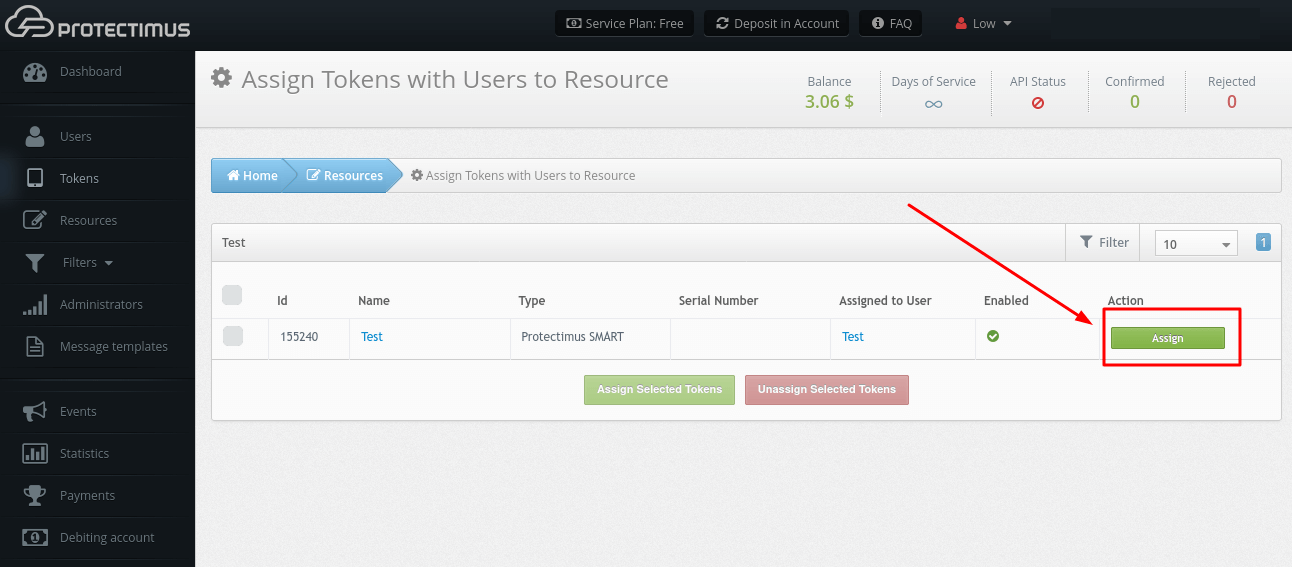
Користувачі та Токени повинні бути призначені на Ресурс, інакше Користувачі не матимуть доступу до цього Ресурсу, а Токени не працюватимуть. Спосіб призначення Користувача на Ресурс залежить від обраного методу автентифікації. Protectimus підтримує декілька методів автентифікації користувачів:
- Аутентифікація користувача за допомогою статичного пароля. Цей метод вимагає, щоб Користувач мав пароль, і щоб цей Користувач був призначений на Ресурс.
- Аутентифікація користувача за допомогою одноразового пароля. Цей метод вимагає, щоб Користувач мав Токен, і щоб цей Користувач був призначений на Ресурс з цим токеном. Цей метод не працюватиме, якщо Користувач і Токен призначені на Ресурс окремо один від одного.
- Аутентифікація користувача за допомогою статичного пароля та одноразового пароля. Це комбінація двох методів, описаних вище. Користувач повинен бути призначений на ресурс з токеном. Цей Користувач повинен мати пароль. Якщо токен Користувача деактивовано, OTP-аутентифікація не буде виконуватися, в цьому випадку буде перевірятися тільки статичний пароль цього Користувача і відповідність цього Користувача вимогам фільтрів, якщо такі є.
- Аутентифікація за токеном на ресурсі. Цей метод дозволяє не пов’язувати Токен з конкретним Користувачем, а просто перевіряти дійсність одноразового пароля, згенерованого Токеном. Цей метод вимагає, щоб Токен був призначений на Ресурс.

ЗВЕРНІТЬ УВАГУ! Ви можете призначити тільки Користувачів або тільки Токени, якщо ви вибрали автентифікацію Користувача зі статичним паролем або автентифікацію Токеном на ресурсі.
Protectimus Ltd
Carrick house, 49 Fitzwilliam Square,
Dublin D02 N578, Ireland
Ірландія: +353 19 014 565
США: +1 786 796 66 64
Protectimus Ltd
Carrick house, 49 Fitzwilliam Square,
Dublin D02 N578, Ireland
Ірландія: +353 19 014 565
США: +1 786 796 66 64


